
I already had a vanilla ice-cream recipe on my blog. In fact, it was David Lebovitz's recipe. It was there until I deleted the post to replace it with this one.
Yes. I did that.
I discarded a recipe from the ice-cream man himself because I think I have something better. How very dare I! (But I do dare...)

Truth be told, this particular recipe has been my absolute, no doubts about it, any day of the week, go-to recipe for vanilla ice-cream since I started making my own. I just never got around to blogging about it. I posted David's recipe because I was reviewing his book at the time, so it just happened that way. These things happen.
But now I'm finally ready to share the joys of this particular recipe for vanilla bean ice-cream. (Sorry David.)
Now, I don't want to get into a whole food fight and start talking smack about a perfectly good ice-cream from a brilliant book, so there won't be any comparison's between the "old" recipe and this "new" one. I'm just going to tell you why this is my favourite.

Firstly, it came with instructions on how to make it without an ice-cream machine. At the time, I did not own any form of ice-cream machine or churning device, so this was, understandably, very important.
So important, that I've put my skills to food use and have made a video to show you how easy it is to make this without an actual ice-cream maker.
Honestly, when I first attempted this recipe years ago, I actually did so with a huge amount of doubt. I just didn't believe you could do such a thing without the expensive toys. Turns out, you really can. Okay, it takes like... forever (around 6 hours or more), but at the end of it, you're eating creamy smooth ice-cream that's just like the stuff you buy! But better. So much better. Unless you're buying Häagen-Dazs or something, then they're about the same.
Actually, no. They're not the same. With home-made-no-ice-cream-maker ice-cream, you get the smug factor, and smug factor adds like 10 taste points!
Apart from that, the recipe itself is just delicious. Cream, yolks, sugar and vanilla bean. I know it's a very simple ingredients list, but when you do simple, you have to do it right. In this case, it's the perfect ratio of ingredients that makes this ice-cream so delicious.

Double cream for luxury. Single cream for a bit more luxury, but not so much that you feel like you've been eating a block of butter. The right amount of sugar which means it's just the right amount of sweet. And then there's the vanilla bean.
When you steep a whole vanilla bean in cream it imparts the most amazing flavour. Apart from the usual sweet perfume that is vanilla, the bean also adds a really complex "undertone" (look at me getting all fancy with my chef-talk). The best way for me to describe it, is bourbon. It's woody, almost alcoholic, but soft on the taste buds. You don't taste it at first, but it very pleasantly lingers on in the background.

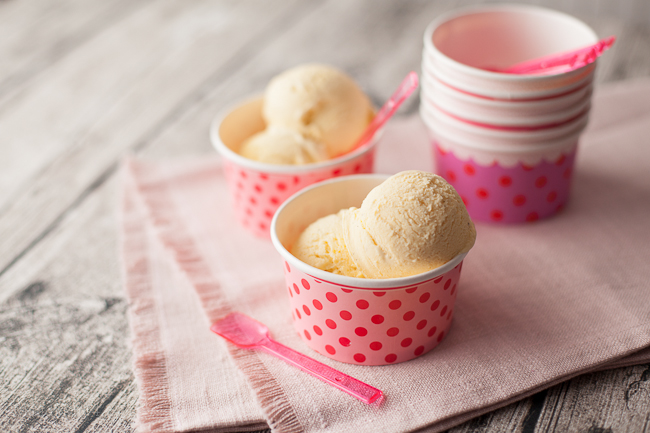
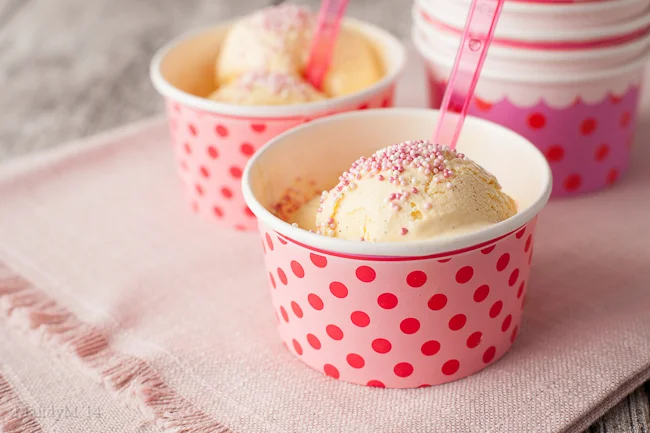
I'm not going to wax poetic about why vanilla ice-cream is so delicious and why you should make it or list all the different things you can do with it. You already know you love it like Katie Price loves botox. You already know you've toyed with the idea of making it. You already know it can be eaten in a bowl with a spoon with chocolate sauce and sprinkles, or melting over a hot pudding or piece of pie. So I'll get straight to the point. Here's a recipe for my all time favourite vanilla ice-cream. And please, use the bean.
Vanilla Bean Ice-Cream
Makes about 1/2 a litre
| Ingredients | ||
|---|---|---|
| 350ml | 12fl oz | Single/Whipping Cream |
| 1 | 1 | Vanilla Pod |
| 4 | 4 | Egg Yolks |
| 250ml | 9fl oz | Double Cream |
Method
- Pour single/whipping cream into a medium sized saucepan over medium heat
- Split the vanilla pod in two lengthways and scrape out the seeds with the back of a knife
- Place the seeds and pod in the cream
- Heat cream just until it starts to boil around the edges
- Remove from heat and leave to infuse for at least an hour
- Place a heatproof bowl over a pot of simmering water then place eggs yolks and sugar in the bowl and whisk together
- Remove vanilla pod from the cream and discard
- Pour the cream into the egg and sugar mixture. Make sure to scrape the saucepan to get all of the seeds into the mixture
- Stir mixture constantly until it thickens enough to coat the back of your spoon, between 20-30mins
- Remove custard from heat then press a piece of clingfilm onto the surface of the custard so that it doesn't form a skin, then refrigerate until completely chilled. At least an hour
- Tip: The above steps can be done the night before, then the following steps picked up the next day
If using an ice-cream maker
- Pour chilled custard and double cream into ice-cream maker (follow manufacturer's instructions regarding pre-chilling etc.) and churn until ice-cream looks like soft serve
- Pour ice-cream into a freezer safe container and chill for an hour or two before enjoying
- As with any ice-cream, leave to sit in the fridge for 20-30mins before serving
If not using an ice-cream maker
- Pour chilled custard into a freezer safe plastic container and freeze for about 45mins
- Once chilled, remove from freezer and beat with an electric mixer on low until custard is smooth, make sure to get into the corners
- In a separate bowl, whip double cream just until soft peaks form
- Fold or mix whipped cream into custard until thoroughly combined
- Return to the freezer for another 45mins
- Remove from freezer and beat with an electric mixer on low, then chill for another 45mins. Repeat this step once more
- On the last time you beat the ice-cream, it should be quite thick and frozen, like soft serve. If not, repeat the beating/chilling one last time.
- Smooth the top of the ice-cream with the back of a spatula and freeze for an hour or two before enjoying
- As with any ice-cream, leave to sit in the fridge for 20-30mins before serving