When Lis e-mailed asking if I'd mind stepping in to host the June challenge I was so excited. It’s not over-complicated, uses simple ingredients, doesn’t take an age to do, but, I think it’s a classic that has a certain whimsical quality, and something that can be loads of fun. There was definitely room for creativity here!
What is it?
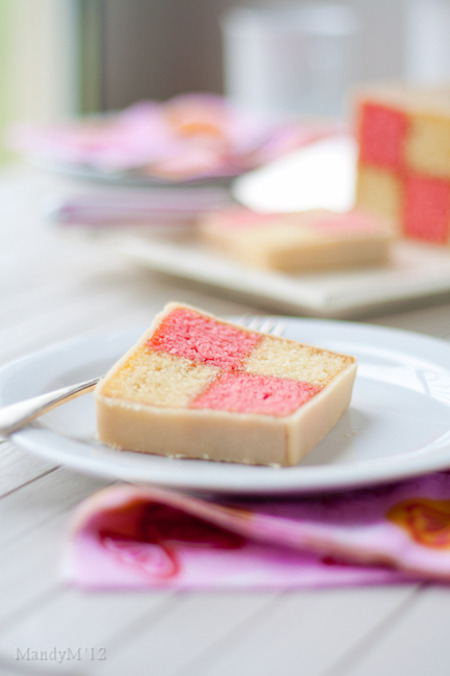
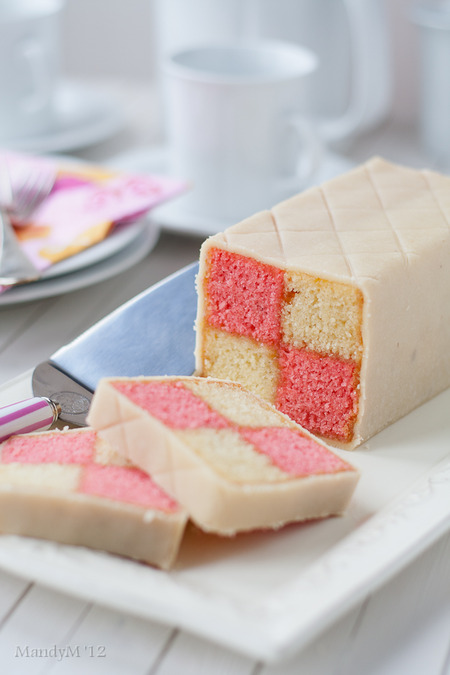
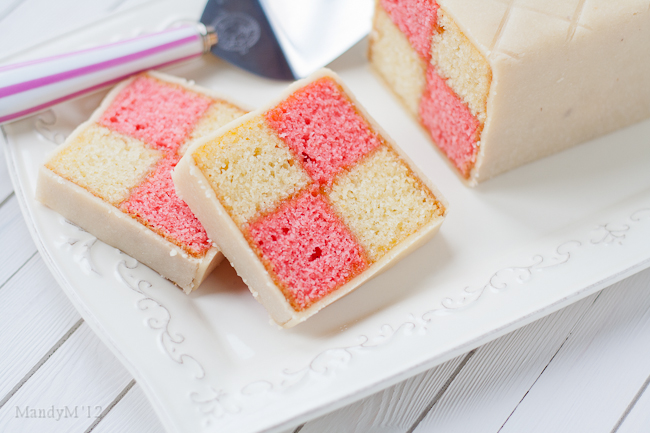
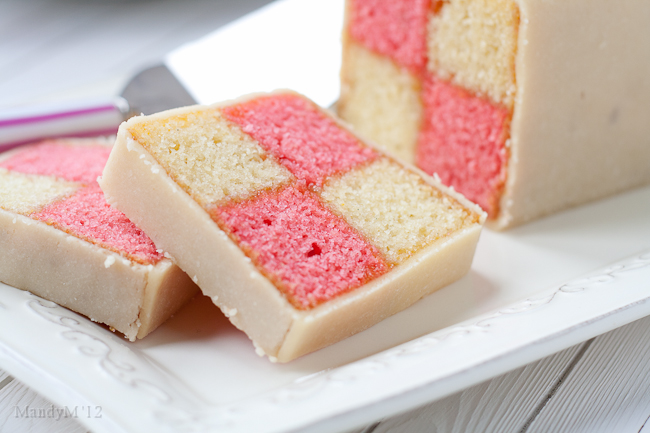
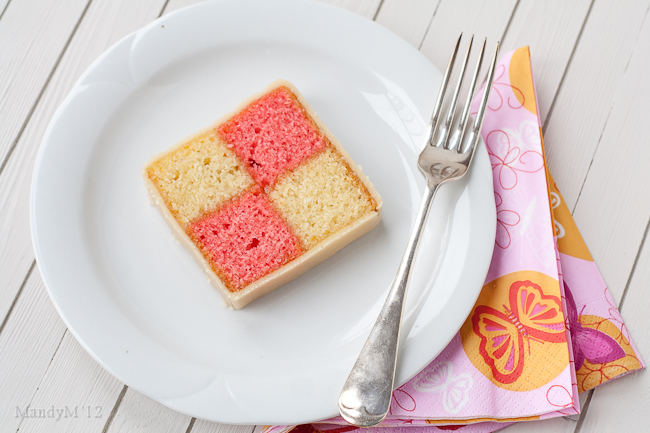
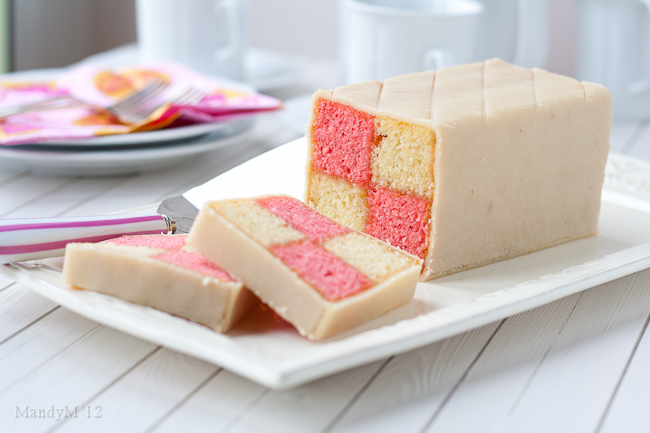
Battenberg Cake!
A traditional Battenberg. Almond flavoured sponge glued together with apricot jam and covered with home made marzipan
Funny enough, before making this cake for the challenge, I hadn’t eaten a single crumb of a Battenberg. But whenever one caught my eye in the store, I couldn't help but look at it with a smile. There’s something about the checkered squares in yellow and pink that makes me think of tea with Alice at the Madhatter’s, or a little girl serving out slices to her teddy bears on little plastic plates.
This cake has far grander beginnings than tea with teddy. It was actually created as a wedding cake for royalty.
The first Battenberg cake was made to celebrate the marriage of Queen Victoria’s granddaughter, Princess Victoria, to husband Prince Louis of Battenberg.
It’s traditionally flavoured with almond and has the signature Battenberg markings, that is, the yellow and pink squares (said to represent the four princes of Battenberg). The strips of sponge are glued together using jam (normally apricot) and the whole cake is covered in marzipan. Sometimes the edges are crimped and the top is patterned with a knife.
Being that this recipe is thoroughly English, I thought it would be appropriate to use a recipe from a fantastic English baker, Mary Berry. (Don’t you just love her name?). This traditional Battenberg recipe comes from Mary Berry’s “Baking Bible”. It’s an all in one cake method, so very simple, quick and very few dirty dishes!
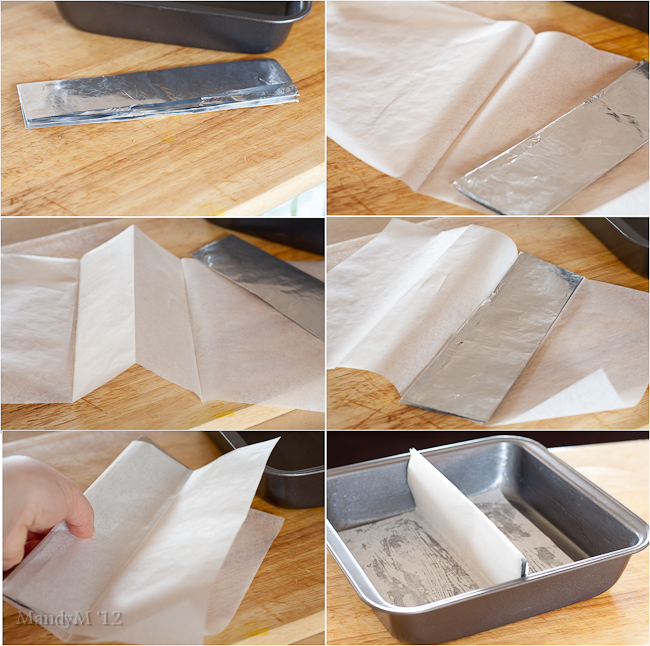
Making a pan divider. I used foil to strengthen the inside of the divider
Although there are specialised Battenberg cake tins available, you don’t need one. This can be baked in a square baking tin and a divide made with foil to separate the two batters. This recipe really is all about simplicity.

Trimming the sponge to make 4 neat strips all with nicely squared ends
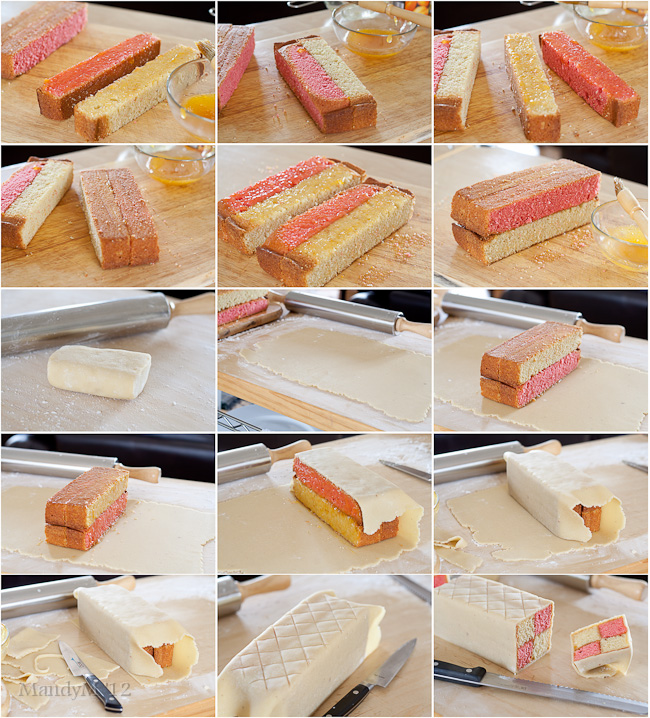
Assembling the Battenberg. A lot of steps but actually quite simple
The challenge was to make a Battenberg cake. It had to be in the traditional shape (square oblong) and had to have at least two different coloured checks as well as be covered in a firm edible covering like marzipan. But, the DBers could choose any flavours, and even do more than two colours. I encouraged everyone to use marzipan, but I know many people don’t like marzipan at all, so also on option was to use rolled fondant or chocolate plastique to cover the cake. The Daring Bakers could also use buttercreams, curd, ganache etc instead of jam to glue the cake together.
Battenberg up!
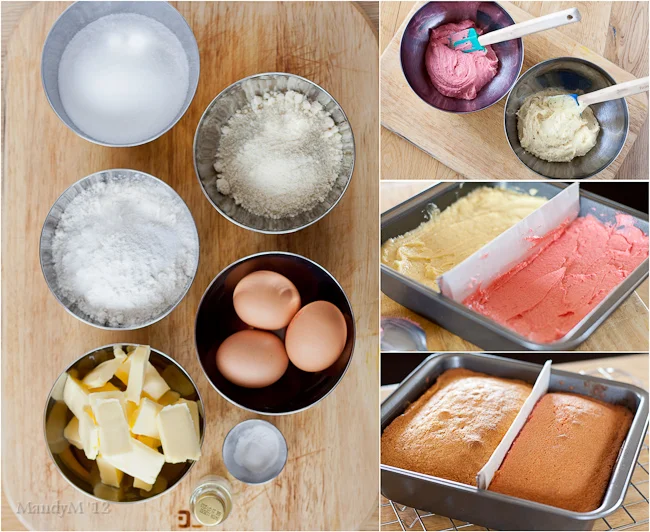
Ingredients
175g / 6 oz (¾ cup / 1½ sticks) Unsalted Butter, softened & cut in cubes
175g / 6 oz (¾ cup) Caster Sugar
175g / 6 oz (1 1/3 cups) Self-Raising Flour (***see end of doc on how to make your own)
3 Large Eggs, room temp
65g / 2 1/3 oz (½ cup) Ground Almonds (Can be substituted with ground rice)
3/4 tsp Baking Powder
½ tsp Vanilla Extract
1/4 tsp Almond Extract
Red Food Colouring, paste, liquid or gel
To Finish
100g / 3 ½ oz (1/3 cup) Apricot Jam
225g / 8 oz Marzipan, natural or yellow (store-bought)
Method
- Preheat oven to moderate 350°F/180°C/160°C Fan Assisted/Gas Mark 4
- Grease an 8”/20cm square baking tin with butter
- Line the tin with parchment paper, creating a divide in the middle with the parchment (or foil)
- - Tip: See photos or watch video at end for detailed instructions
- OR Prepare Battenberg tin by brushing the tin with melted butter and flouring
- Whisk together the dry ingredients then combine with the wet ingredients in a large bowl and beat together just until the ingredients are combined and the batter is smooth
- Spoon half the mixture into the one side of the prepared baking tin
- Add a few drops of red food liquid/gel/paste to the remaining batter, stir until the colour is thoroughly distributed, add more colour if needed
- Spoon the pink batter into the other half of the prepared baking tin
- Smooth the surface of the batter with a spatula, making sure batter is in each corner
- Bake for 25-30mins until the cake is well risen, springs back when lightly touched and a toothpick comes out clean (it should shrink away from the sides of the pan)
- Leave to cool in the tin for a few minutes before turning out to cool thoroughly on a wire rack
- Once completely cool, trim the edges of the cake with a long serrated knife
- Cut each coloured sponge in half lengthways so that you are left with four long strips of sponge
- Neaten the strips and trim as necessary so that your checkered pattern is as neat and even as possible
- Gently heat the apricot jam and pass through a small sieve
- Brush warmed jam onto the strips of cake to stick the cake together in a checkered pattern (one yellow next to one pink. On top of that, one pink next to one yellow)
- - Tip: See photos for detailed instructions
- Dust a large flat surface with icing sugar then roll the marzipan in an oblong shape that is wide enough to cover the length of the cake and long enough to completely wrap the cake
- Brush the top of the cake with apricot jam
- Place the cake on the marzipan, jam side down
- - Tip: Either in the middle or to the one side of the marzipan
- Brush the remaining three sides with jam
- Press the marzipan around the cake, making sure the join is either neatly in the one corner, or will be underneath the cake once turned over
- - Tip: If you put the sponge to the one side of the marzipan, I found it easiest to "roll" the sponge over and over onto the marzipan instead of lifting the marzipan up onto the sponge
- Carefully flip the cake over so that the seam is under the cake and score the top of the cake with a knife, you can also crimp the top corners with your fingers to decorate
- Neaten the ends of the cake and remove excess marzipan by trimming off a small bit of cake on both ends to reveal the pattern
Other Tips:
Lisa, my baker in crime over at Parsley, Sage, Desserts and Line Drives (she called herself my "sidekick" for this, I guess that makes me Wonder Baker? Cake Woman? Something cool anyway ;) ) had an amazing Battenberg lined up but came head to head with the Evil Lord Humidity, which unfortunately thwarted her arsenal of batter and marzipan. It brought to light dealing with the same baker unfriendly weather.
So, a few tips when working with marzipan/fondant/chocolate plastique in humid and hot weather. Firstly, keep it cool. It does need to be pliable, but it won't hurt to chill it just slightly to help keep your covering from "melting" and becoming too sticky to work with. You do need to knead it to get it ready for rolling and covering but try to handle it as little as possible as soon as it's pliable enough, and if you need to, roll out the marzipan in between sheets of parchment paper and use plenty of corn flour or powdered sugar on your rolling pin, hands, surface etc.
I've adapted Mary Berry's recipes quite a bit in terms of quantities 'cause I found the amount of batter to be too little for an 8"x8" (20cmx20cm) cake pan, once the sponges were trimmed the strips were a bit on the slim side. The amounts provided are perfect for an 8"x8" (20cmx20cm) tin.
However, if you do have a Battenberg pan (8"x6") (20cmx15cm) then you will have some leftover batter. Just fill your Battenberg tin to 3/4 full and that should be enough for the batter to rise above the top of the pan which you can then trim off.
The batter is your basic sponge recipe, equal amounts of butter, sugar and flour (in weight) and it's not a fussy recipe at all. Although a lot of Battenberg recipes first cream the butter and sugar, Mary Berry swears she gets a better Battenberg sponge by using the all in one method, and I must say, my sponges came out great using the all in one method. But you're welcome to use the creaming method if you like. And if you do use the all in one method, just make sure you don't over mix the batter, once it's all combined, it's done (hard for a chronic over mixer like me!). I didn't even bother using my stand mixer, I used my hand electric mixer, and I think you could quite easily even use a wooden spoon for some old school baking ;)
If you want to add a flavour to one of the sponges in liquid form, make sure to add the same amount of liquid to the other batter in the form of milk. The batter is very thick and should be quite thick so don't add too much. You'll see an example of this in the Walnut & Coffee Battenberg.
I've included links at the end of the post for home made marzipan as well as chocolate plastique/modelling chocolate. Also at the end of the post is how to make your own self raising flour.
Storage instructions:
- Battenberg will keep for 3-4 days stored at room temperature in an airtight container
- Keep chocolate plastique in an airtight container at room temperature, it will keep for as long as the expiry date on the chocolate wrapper
How to make your own self raising flour:
1 cup Self Raising Flour = 1 cup / 115g All Purpose Flour + 1 ½ tsp Baking Powder + ¼ tsp Salt (omit salt if there is salt in the recipe) sifted together
If you'd like to make your own marzipan, I use Delia Smith's recipe
If you'd prefer not to use eggs in your marzipan, this recipe from BBC Good Food is also good