The February 2010 Daring Bakers’ challenge was hosted by Aparna of My Diverse Kitchen and Deeba of Passionate About Baking. They chose Tiramisu as the challenge for the month. Their challenge recipe is based on recipes from The Washington Post, Cordon Bleu at Home and Baking Obsession.
This month our two fantastic hostesses chose a very popular dessert as our challenge. One of my favourites, that's for sure, so I was really excited about getting stuck in to this one.
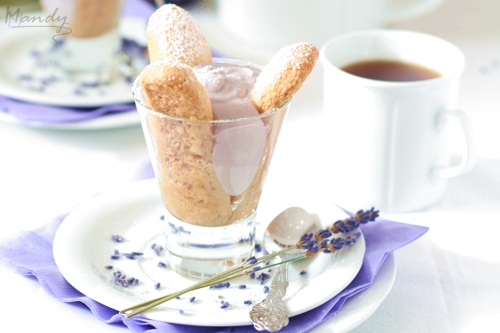
Blue Rinse Tiramisu, flavours of lavender & Earl Grey tea
Deeba & Aparna chose Tiramisu, an Italian dessert made mostly with mascarpone cheese, boudoir biscuits and coffee. If you've never had Tiramisu before, I suggest you give it a try. There are quite a few versions of Tiramisu, some with raw egg, some with cooked egg, some with none, some with or without alcohol, and even the alcohol choice is different between recipes. Basically it is layers of savoiardi biscuits dipped in strong espresso with a hint of alcohol like brandy alternating with layers of a luxurious and sweet mascarpone mixture then dusted generously with cocoa powder. It may sound fairly simple, but every spoonful leaves you wanting more.
I've made Tiramisu many times before and it is fairly simple to put together but the ladies had something up their sleeves to make this month's recipe a good challenge. We were told that we'd be making Tiramisu from scratch.... Yup, we'd be making everything. That meant not only assembling the dessert, but making everything we need to put it together, so we'd be baking our own lady finger biscuits and making our own mascarpone cheese. Awesome!
Piped, baked & ready to use (or eat!)
I'll admit, when I first saw the recipe they'd chosen, I was a little sceptical. Even though there are various versions of Tiramisu, I wouldn't call this one authentic. Never before have I seen a Tiramisu recipe that includes pastry cream and so little mascarpone. But, and I'll explain why in just a bit, the pastry cream was perfect for what I had in mind.
Getting ready to assemble my individual Blue Rinse Tiramisu
As with all DB challenges, a few guidelines were put in place. Making our own lady fingers and mascarpone was mandatory but we were given freedom with flavours and presentation. At first I thought I'd stick to the original recipe 'cause I really do love Tiramisu just as it is, but my brain being the way it is decided that I had to do something a little different, after all, there will be plenty other opportunities to make and eat "plain" Tiramisu.
With a dessert like Tiramisu I think it's easy to go a little overboard with flavour choices and over complicate something that should be fairly simple. After all, if it aint broke.... so at first I thought up two simple flavour choices, one Tiramisu with Baileys, and one with Frangelico. Both of them turned out delicious and I'm glad I stuck to a simple flavour change, I would make both variations again!
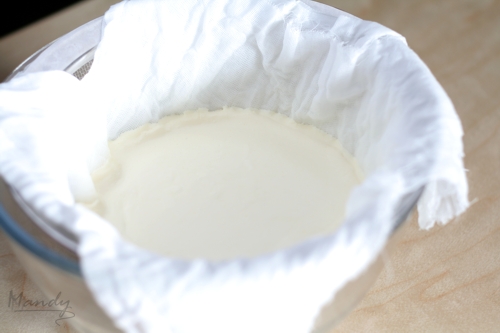
Drained mascarpone, thick & delicious
Then inspiration hit me when I was reading through the DB forums and someone was asking what other liquid she could use to dip the lady fingers in instead of coffee. Plenty of options were given like using fruit juice and I suggested that she could also use tea. Then and idea hit me, what if I use Earl Grey tea?
Now, you need to understand, I absolutely hate tea, something about having too much of it when I was a kid, so for me to think of Earl Grey tea was definitely not something of the norm. My husband loves Earl Grey so I knew I'd have at least one person who'd have no trouble finishing off the dessert. Then I had another unusual idea, flavour the mascarpone with lavender. Unusual because I've never used lavender before and have never wanted to try it. But, good things come out of trying new things and my Blue Rinse Tiramisu was born.
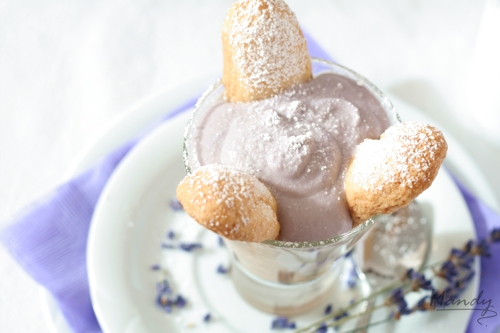
Lightly purple Blue Rinse Tiramisu
Why Blue Rinse? Well, the name actually came from my genius husband! I was telling him my plans for a lavender and Earl Grey Tiramisu and told him that the combination reminded me of old ladies with purple hair. He then said something like "Oh yes, those purple or blue dye ladies." to which I answered, "Oh yes, blue rinse!" Hence the name was born. :)
Here's where the pasty cream in this recipe was the perfect thing for my Blue Rinse version. I bought some lovely lavender sugar and used that in place of the granulated sugar in the recipe. I don't think flavouring just the zabaglione would have given enough of a lavender flavour so being able to flavour the pastry cream as well worked really well and the end result had a lovely flavour without being too weak or overpowering.
All in all, I'll stick to my tried, tested and favourite Tiramisu recipe 'cause it's quicker to make and tastes fantastic, but if I want to infuse some interesting flavour like lavender, the DB recipe with pastry cream is really useful.
The following recipe is the DB challenge recipe with my changes which includes adding extra mascarpone (as I mentioned before, Tiramisu is all about the mascarpone and I felt this recipe just didn't have enough), decreasing the sugar and flavouring with lavender and Earl Grey tea, but if you'd like to see the original challenge recipe, you can see it at The Daring Kitchen.
Oh, and last thoughts, I LOVED the Blue Rinse Tiramisu, tea and all! I actually found it to be very refreshing and quite light considering some of the rich ingredients, so it's perfect after a heavy meal :D
Blue Rinse Tiramisu
Ingredients:
Zabaglione:
2 large Egg Yolks
3 Tbsp Lavender Sugar
1/4 cup Earl Grey Tea
1/4 tsp Vanilla Extract
Lavender Pastry Cream:
1/4 cup Lavender Sugar
1 Tbsp All Purpose Flour
1/2 tsp Vanilla Extract
1 large Egg Yolk
3/4 cup Milk
Whipped Cream:
1 cup Chilled Heavy / Whipping Cream
1/2 tsp Vanilla Extract
To assemble the Tiramisu:
2 cups Strong Earl Grey Tea, room temp (I used 4 teabags)
150g Mascarpone Cheese
36 Savoiardi / Ladyfinger / Boudoir Biscuits
Grated White Chocolate or Powdered Sugar for sprinkling
Purple/Violet Paste Food Colouring
Method:
For the zabaglione:
- Heat water in a double boiler
- Tip: If you don’t have a double boiler, place a pot with about an inch of water in it on the stove. Place a heat-proof bowl in the pot making sure the bottom does not touch the water
- In a large mixing bowl mix together the egg yolks, lavender sugar, Earl Grey tea and vanilla extract
- Whisk together until the yolks are fully blended and the mixture looks smooth
- Transfer the mixture to the top of a double boiler or place your bowl over the pan / pot with simmering water
- Cook the egg mixture over low heat, stirring constantly, for about 8 minutes or until it resembles thick custard
- Tip: I ended up having to bring the water to a boil in order for the zabaglione to thicken up
- It may bubble a bit as it reaches that consistency
- Remove from heat and strain to remove any lavender bits
- Let cool to room temperature and transfer the zabaglione to a bowl
- Cover and refrigerate at least 4 hours or overnight, until thoroughly chilled
For the pastry cream:
- Mix together the lavender sugar, flour and vanilla extract in a medium heavy-bottomed saucepan
- To this add the egg yolk and half the milk
- Whisk until smooth
- Now place the saucepan over low heat and cook, stirring constantly to prevent the mixture from curdling
- Add the remaining milk a little at a time, still stirring constantly
- After about 12 minutes the mixture will be thick, free of lumps and beginning to bubble
- Tip: If you have a few lumps, don’t worry. You can push the cream through a fine-mesh strainer
- Pour through a strainer to remove any lavender bits
- Transfer the pastry cream to a bowl and cool to room temperature
- Cover with plastic film and refrigerate at least 4 hours or overnight, until thoroughly chilled
For the whipped cream:
- Combine the cream and vanilla extract in a mixing bowl
- Beat with an electric hand mixer or whisk by hand until the mixture holds stiff peaks
- Set aside
To assemble the tiramisu:
- Have ready a rectangular serving dish (about 8" by 8") or individual serving glasses
- Pour your cool Earl Grey tea in a shallow dish for dipping the biscuits
- In a large bowl, beat the mascarpone cheese and purple/violet paste colouring until smooth and desired colour is acquired
- Add the prepared and chilled zabaglione and pastry cream, blending until just combined
- Gently fold in the whipped cream
- Set this cream mixture aside
- Workings quickly, dip 12 of the ladyfingers in the Earl Grey tea, about 1 second per side
- Tip: They should be moist but not soggy. If using store bought biscuits, they'll be drier and can be dipped for longer
- Immediately transfer each ladyfinger to the platter, placing them side by side in a single row or into the individual glasses
- Tip: You may break a lady finger into two, if necessary, to ensure the base of your dish is completely covered
- Spoon one third of the cream mixture on top of the ladyfingers, then use a rubber spatula or spreading knife to cover the top evenly, all the way to the edges
- Repeat to create 2 more layers, using 12 ladyfingers and the cream mixture for each layer, ending with the cream mixture on top
- or
- Spoon in required amount into each serving glass
- Tip: The amount you spoon in depends on the size of your individual serving glasses and if you're doing layers or not
- Tip: I didn't do layers in the Blue Rinse Tiramisu so I spooned in enough of the mixture till it reached the top of the glass
- Clean any spilled cream mixture
- Cover carefully with plastic wrap and refrigerate the tiramisu overnight
- To serve, carefully remove the plastic wrap and sprinkle the tiramisu with grated white chocolate or powdered sugar using a fine-mesh strainer or decorate as you please
Mascarpone Cheese
This recipe makes 12oz / 340g of mascarpone cheese
Ingredients:
500ml / 2 cups Whipping / Heavy Pasteurized (not ultra-pasteurized) Cream
1 Tbsp Fresh Lemon Juice
Method:
- Bring 1 inch of water to a boil in a wide skillet or large pot
- Reduce the heat to a simmer
- Pour the cream into a medium heat-resistant stainless steel bowl, then place the bowl into the skillet or pot
- Tip: It doesn't matter if the bowl does or doesn't touch the water
- Heat the cream, stirring often, until you see small bubbles starting to push to the surface, about 80°C to 90°C
- Tip: It will take about 15 minutes of delicate heating
- Add the lemon juice and continue heating the mixture, stirring gently, until the cream curdles
- Tip: Do not expect the same action as you see during ricotta cheese making. All that the whipping cream will do is become thicker, like a well-done crème anglaise. It will cover a back of your wooden spoon thickly. You will see just a few clear whey streaks when you stir
- Remove the bowl from the water and let cool for about 20 minutes
- Meanwhile, line a sieve with four layers of dampened cheesecloth and set it over a bowl
- Tip: A think kitchen towel will do
- Transfer the mixture into the lined sieve
- Tip: Do not squeeze the cheese in the cheesecloth or press on its surface, be patient, it will firm up after refrigeration time
- Once cooled completely, cover with plastic wrap and refrigerate (in the sieve) overnight or up to 24 hours
- Keep refrigerated and use within 3 to 4 days
Lady Finger/ Boudoir / Savoiardi Biscuits
This recipe makes approximately 24 big ladyfingers or 45 small (2 1/2" to 3" long) ladyfingers
Ingredients:
3 Eggs, separated
6 Tbsp Granulated Sugar
3/4 cup/95gms Cake Flour, sifted
Confectioner's / Powdered Sugar
Method:
- Preheat oven to 350°F / 180°C (160°C Fan Assisted)
- Lightly brush 2 baking sheets with oil or softened butter and line with parchment paper
- Beat the egg whites using a hand held electric mixer until stiff peaks form
- Gradually add granulate sugar and continue beating until the egg whites become stiff again, glossy and smooth
- In a small bowl, beat the egg yolks lightly with a fork and fold them into the meringue, using a wooden spoon
- Sift the flour over this mixture and fold gently until just mixed
- Tip: It is important to fold very gently and not overdo the folding otherwise the batter would deflate and lose volume resulting in ladyfingers which are flat and not spongy
- Fit a pastry bag with a plain tip and fill with the batter
- Tip: Or use a Ziplock bag with a corner snipped off
- Pipe the batter into 5" long and 3/4" wide strips leaving about 1" space in between the strips
- Tip: You can pipe them to exactly the size you need for your individual serving glasses, even doing round discs
- Tip: To get them uniform, draw line on the underside of the parchment paper to pipe over
- Generously dust confectioner's sugar over the ladyfingers and wait for 5 minutes
- Tip: The sugar will pearl or look wet and glisten
- Again, generously dust the piped batter again with the powdered sugar
- Tip: This helps to give the ladyfingers their characteristic crispness
- Tip: While I was taking photos, the powdered sugar kept disappearing into the batter so mine got about 4-5 generous dustings, but this may have helped keep them from spreading too much while baking
- Bake the ladyfingers for 10 minutes, then rotate the sheets and bake for another 5 minutes or so until the puff up, turn lightly golden brown and are still soft
- Allow them to cool then remove the ladyfingers from the baking sheet with a metal spatula and cool throughly on a rack
- Store them in an airtight container till required
- Tip: They should keep for 2 to 3 weeks
Thanks again to Aparna & Deeba for this great challenge, I really had a good time with this one!
Have a look at my Baileys Tiramisu that I also made using the home made mascarpone & boudoir biscuits with an adapted Gordon Ramsay recipe which contains no egg.
Or check out the delicious Frangelico Tiramisu that I made adapting my favourite Tiramisu recipe with a few small changes to make it without raw egg.
Other Tips
If making this as a single tiramisu in a large dish, serves 6 - 8 portions
Can be frozen. Cover dish well with plastic wrap and freeze. Allow to sit out at room temperature to defrost, about 15-30mins depending on your climate


